Flutter で Android アプリをビルドして、AppLinks でhttps:// の URL からアプリを起動できるようになるまで
2021-12-26 22:14 (3年前)
ytyng

Android の AppLinks は、Android の Chrome で https:// 〜 の URL に遷移する際、パターンにマッチした時にアプリを起動する機能です。従来からある Deep Link とは違い、アプリを署名で判断するので、ドメイン内でコントロールしている特定のアプリのみに、安全に情報を渡すことができます。
その機能が使えるようになるまで書きます。
% flutter doctor
Doctor summary (to see all details, run flutter doctor -v):
[✓] Flutter (Channel stable, 2.8.1, on macOS 12.0.1 21A559 darwin-arm, locale ja-JP)
[✓] Android toolchain - develop for Android devices (Android SDK version 32.0.0)
[✓] Xcode - develop for iOS and macOS (Xcode 13.1)
[✓] Chrome - develop for the web
[✓] Android Studio (version 2020.3)
[✓] IntelliJ IDEA Ultimate Edition (version 2021.3)
[✓] VS Code (version 1.62.3)
[✓] Connected device (2 available)
(使うエディターは VS Code ではなく Android Studio です)
新規アプリの作成
Android Studio → File メニュー → New → New Flutter Project
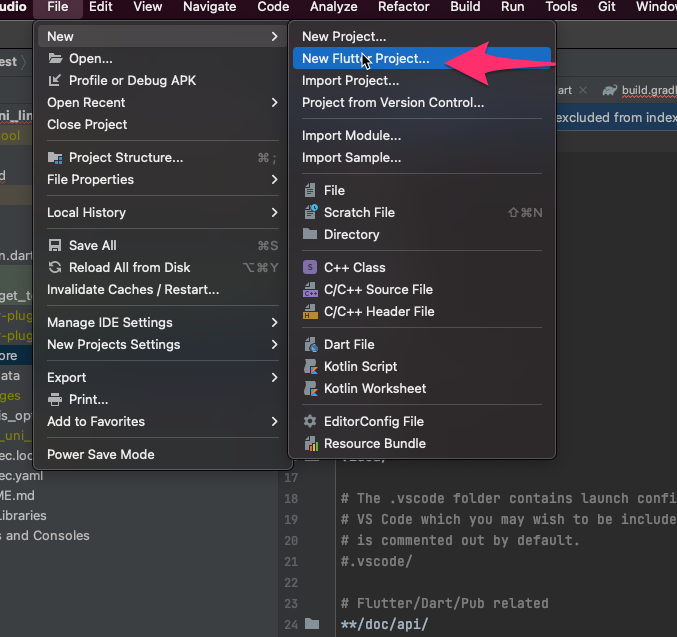
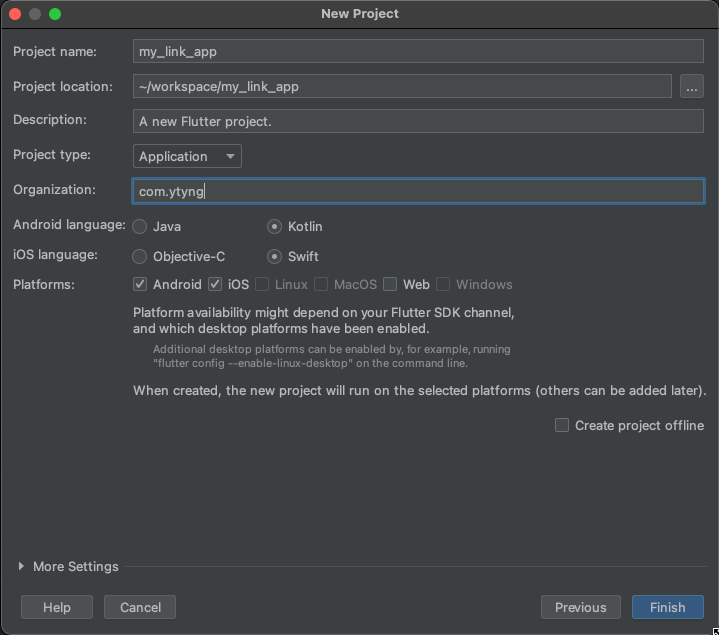
Flutter → Next
Project name: my_link_app (自由につける)
Organization: com.ytyng (自由につける)
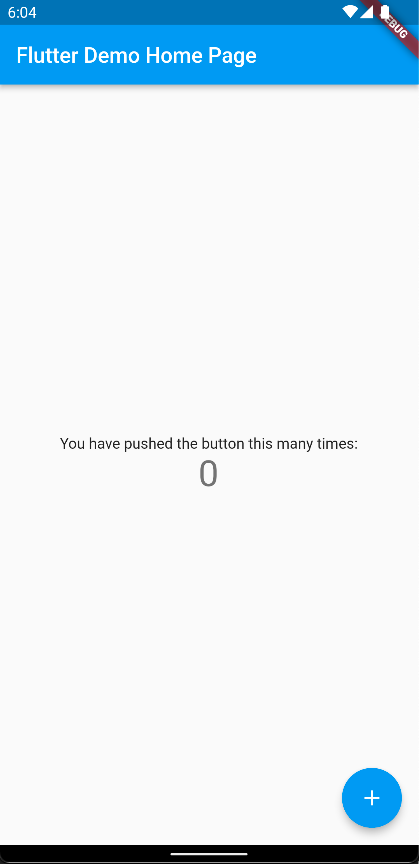
一度起動してみる。デモのカウンターアプリが起動する。
キーストアの作成
参考 https://developer.android.com/studio/publish/app-signing?hl=ja#generate-key
File -> Open... から android ディレクトリを指定して Open。Androidのプロジェクトフォルダを Android Studio で新たに開く。
キーストアを作成する。既にあるキーストアを使う場合はこの手順は不要。
Build メニューから Generate Signed Bundle / APK... を選択
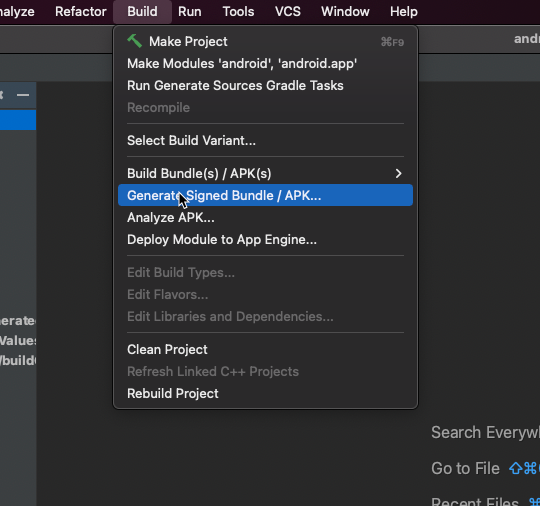
APK を選択して Next
(Android App Bundle でも問題無い)
Key store path で Create new... を押す

key store path を適当に指定。今回は、android フォルダの下に keystore.jks とかで作った。
password, confirm
など、埋める。
キーストアを作ったら、Next を押す
Build Variants の設定は、debug, profile, release を Shift を押して全部選択して Finish。
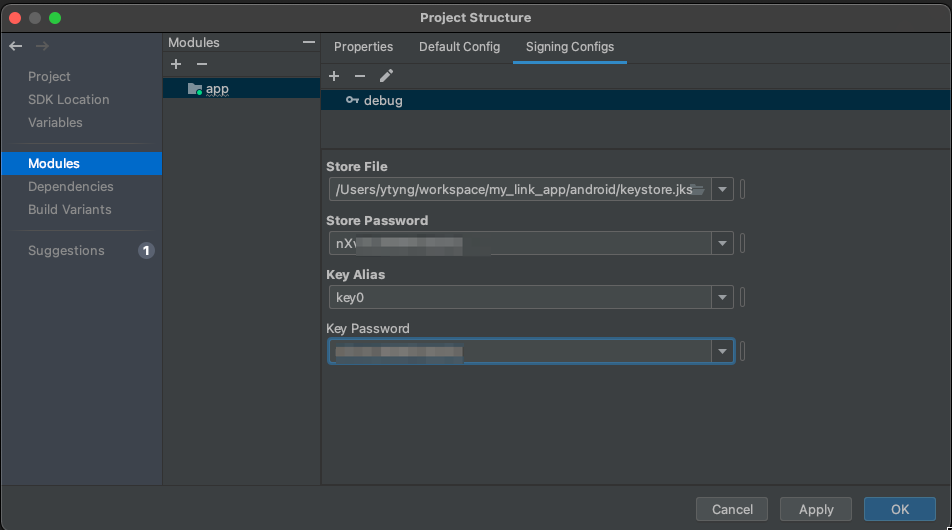
そのまま、android プロジェクトを開いている Android Studio の File -> Project Structure
Modules の Signing Config を 見る
debug の config ができているので、この詳細を書く。
Store File はさきほど作ったキーストア、 Key Alias はさきほどの Alias (key0)、パスワードも入力。OKで閉じる
再度Project Structure.
Modules -> Default Config の、Signing Config に、さきほどの debug 設定を入れておく。

Project Structure の Build Variants の、各バリアントの Signing Config にも、さきほどの debug 設定を入れる。
エミュレータで起動しているアプリを止めて再実行する。
すると、アプリの起動ができなくなるかもしれない。
FAILURE: Build failed with an exception.

* What went wrong:
Execution failed for task ':app:packageDebug'.
> A failure occurred while executing com.android.build.gradle.tasks.PackageAndroidArtifact$IncrementalSplitterRunnable
   > Entry name 'assets/flutter_assets/AssetManifest.json' collided

* Try:
Run with --stacktrace option to get the stack trace. Run with --info or --debug option to get more log output. Run with --scan to get full insights.

* Get more help at https://help.gradle.org

BUILD FAILED in 11s
Exception: Gradle task assembleDebug failed with exit code 1
署名が変わっており、再インストールできないため。
一度、エミュレータでアプリをアンインストールして再度起動してみると起動できる。
署名を確認する
作ったキーストアのフィンガープリントを確認する。
% keytool -J-Duser.language=en -list -v -keystore android/keystore.jks
Enter keystore password:
Keystore type: PKCS12
Keystore provider: SUN

Your keystore contains 1 entry

Alias name: key0
Creation date: Dec 26, 2021
Entry type: PrivateKeyEntry
Certificate chain length: 1
Certificate[1]:
Owner: O=ytyng
Issuer: O=ytyng
Serial number: 4b0bf92f
Valid from: Sun Dec 26 21:16:44 JST 2021 until: Thu Dec 20 21:16:44 JST 2046
Certificate fingerprints:
    SHA1: 9D:CB:5B:FC:DE:30:94:5B:8B:AC:AC:B3:89:69:CE:3C:E8:6C:5A:2A
    SHA256: B3:A2:05:04:F6:75:A7:27:A3:77:96:E2:E1:CF:1B:9A:4B:90:3D:25:E6:67:D0:78:A5:C9:72:1C:D8:93:77:52
Signature algorithm name: SHA256withRSA
Subject Public Key Algorithm: 2048-bit RSA key
もし、内容が日本語で表示されると、SHA256箇所がちゃんと表示されない不具合があるので、-J-Duser.language=en を指定して英語出力を強制する。
SHA256 のフィンガープリントを覚えておく。
デバッグビルドして Android エミュレータにインストールされたアプリの署名も確認する。
% keytool -J-Duser.language=en -list -printcert -jarfile build/app/outputs/flutter-apk/app-debug.apk
Signer #1:

Signature:

Owner: O=ytyng
Issuer: O=ytyng
Serial number: 4b0bf92f
Valid from: Sun Dec 26 21:16:44 JST 2021 until: Thu Dec 20 21:16:44 JST 2046
Certificate fingerprints:
    SHA1: 9D:CB:5B:FC:DE:30:94:5B:8B:AC:AC:B3:89:69:CE:3C:E8:6C:5A:2A
    SHA256: B3:A2:05:04:F6:75:A7:27:A3:77:96:E2:E1:CF:1B:9A:4B:90:3D:25:E6:67:D0:78:A5:C9:72:1C:D8:93:77:52
Signature algorithm name: SHA256withRSA
Subject Public Key Algorithm: 2048-bit RSA key
Version: 3

Extensions:
署名が同じなので、さきほどのキーストアで署名ができていることが確認できた。
インテントフィルタを書く
参考 https://developer.android.com/studio/write/app-link-indexing?hl=ja
https://qiita.com/noboru_i/items/fd4634ecb326b3749ac0
android/app/src/main/AndroidManifest.xml を開いて
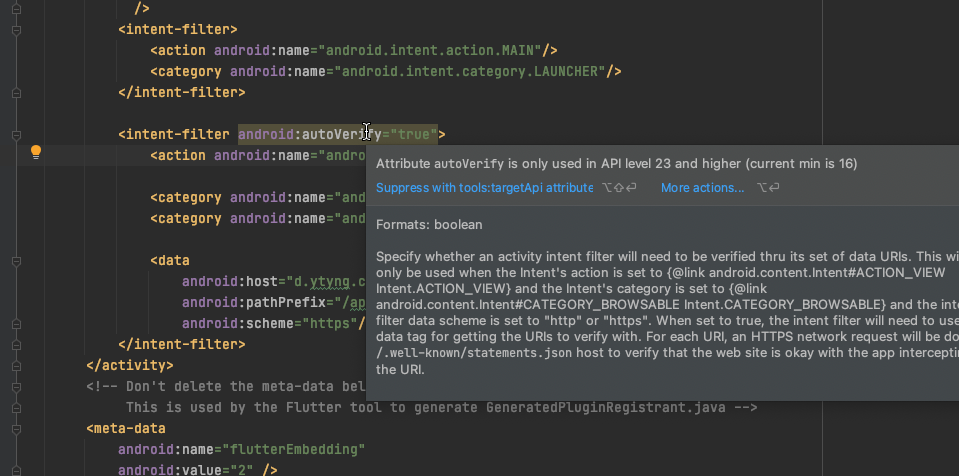
activity の中に <intent-filter> を追加する。
<intent-filter android:autoVerify="true">
 <action android:name="android.intent.action.VIEW"/>

 <category android:name="android.intent.category.DEFAULT"/>
 <category android:name="android.intent.category.BROWSABLE"/>

 <data
 android:host="www.ytyng.com"
 android:pathPrefix="/my-app-link"
 android:scheme="https"/>
</intent-filter>
今回は、 https://www.ytyng.com/my-app-link/xxxx を指定した時、アプリが起動するようにした。
Min API Level の設定
上記インテントフィルタを設定した時、AndroidManifest.xml を android フォルダを開いている Android Studio で見ると、
autoVerify="true" の箇所に警告が出て、 API level 23 and higher (current min is 16) と表示される。
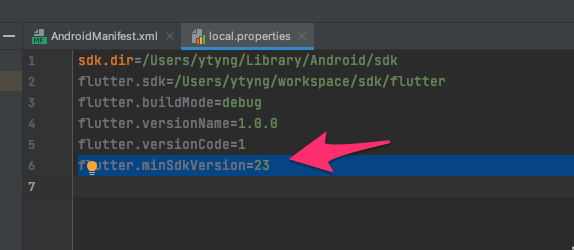
Min API Level を設定するには、android ディレクトリ以下の local.properties を開いて、
flutter.minSdkVersion=23
を記入する。
uni_links の導入
Pub から uni_links を入れる。
https://pub.dev/packages/uni_links
pubspeck.yaml の dependencies の中に
uni_links: ^0.5.1
を追加して、 Pub get する。
ウィジェットの修正
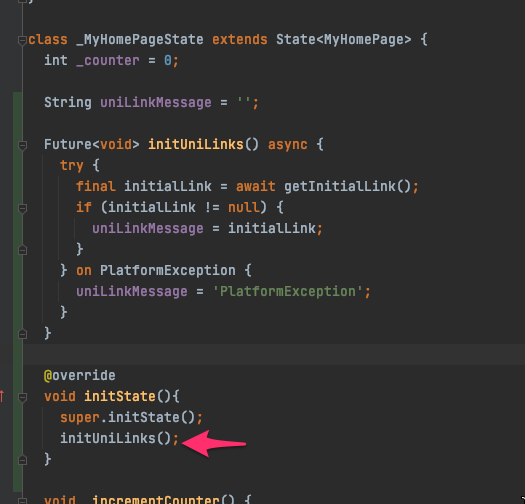
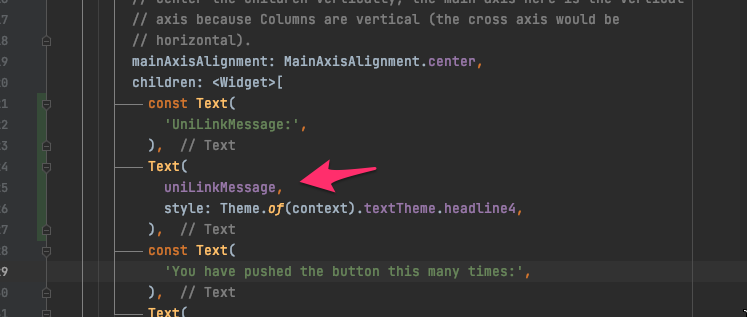
動作確認用に、起動URL を見れるようにしておく
簡易的に、デモアプリの main.dart に、uni_links の pub のページにある
getInitialLink() の結果を表示するコードを書いておく。
アプリ側の準備はこれで終わり。
サーバサイドの設定
サーバの /.well-known/assetlinks.json に、下記の内容を配置する。
[
  {
    "relation": ["delegate_permission/common.handle_all_urls"],
    "target": {
      "namespace": "android_app",
      "package_name": "com.ytyng.my_link_app",
      "sha256_cert_fingerprints":
      ["B3:A2:05:04:F6:75:A7:27:A3:77:96:E2:E1:CF:1B:9A:4B:90:3D:25:E6:67:D0:78:A5:C9:72:1C:D8:93:77:52"]
    }
  }
]
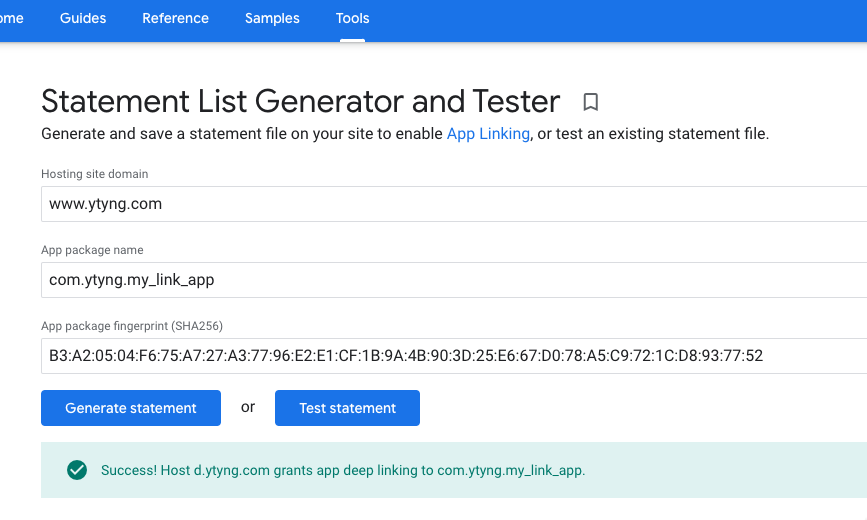
sha256_cert_fingerprints は、先程 keytool で確認した署名を入れる。
assetlinks.json をデプロイしたら、このツールで確認する
https://developers.google.com/digital-asset-links/tools/generator?hl=ja
起動動作確認用に、App Link を起動するページをデプロイする。
<a href="https://www.ytyng.com/auth?token=xxxxxx">アプリでログイン</a>
みたいなリンクを作って、そのページを Android の Chrome で表示する。
アプリは閉じておく。
リンクをクリックして、アプリが起動することを確認する。
開発相談をお待ちしています。